

Splatchinko Demo Beginner Guide: Build a Stable First Run
Learn the Splatchinko Demo combat loop, Eye choices, mutations, map decisions and Globe spending.
For a stable first run, choose one damage engine, add bounce control or survivability, and spend Globes only when the purchase materially improves that plan. Read the next node before committing resources, use the preview line to plan early contacts, and keep the build focused on effects that reinforce one another.
Step-by-step checklist
- Inspect the character's starting Eyes and Mutations before choosing the first reward.
- Choose one main plan: repeated bounces, Bomb chains, splitting copies, Globe economy or defensive scaling.
- Aim for reliable early contacts before chasing a long theoretical path; H.U.D. Sight can expose the second-bounce direction when available.
- At rewards and shops, compare the new option with the plan already in the inventory instead of buying every rare-looking entry.
- Keep enough Globes for the action that matters next. Rerolls double after each successful reroll in the configured charge path, while Loyalty Card halves the current reroll base before rounding up.
- Before a boss node, favor effects that work every turn and verify that the selected Eye still has enough durability or supported recharge behavior.
Understand one turn before optimizing a run
The official Demo description establishes the loop: launch an Eye into a board of pegs, build damage through contacts and trigger the Eye's effects. The trajectory preview and board layout matter because an effect that needs repeated bounces produces nothing when the shot exits immediately.
Add pieces that share the same trigger
A build becomes easier to evaluate when its effects respond to the same event. Bounce bonuses belong with extra-bounce or floor-return tools; Bomb creation belongs with adjacent detonation; Globe-Peg effects belong with effects that seed or reward Globe Pegs.
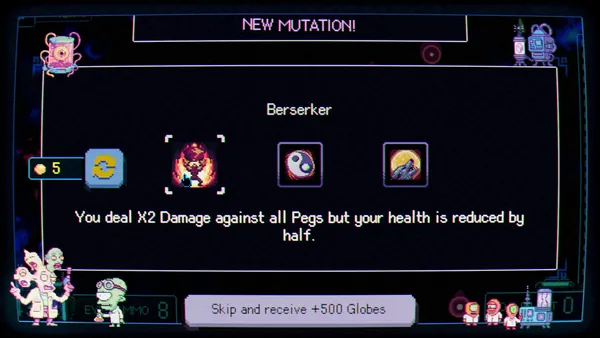
Use the next node to decide what to buy
The official store confirms branching maps with battles, rewards, shops, bosses and third-contact encounters. A shop purchase is useful only if it improves the inventory before the next meaningful fight. Do not spend a whole reserve on rerolls when the current build already has a dependable engine.
Treat the calculator as a budget check
The Globe calculator covers purchase, reroll and supported recharge charges for the dated Demo snapshot. Enter the actual reroll count and missing durability instead of treating the first displayed price as permanent.
Check unlock conditions before planning
The database contains catalog records, upgrade links and unlock conditions. Use the filters and unlock details to confirm that each Eye or Mutation fits the route you are planning.