

We Were Here Tomorrow · Puzzle Solutions
Look up resin and crystal orders, PAT symbols, fuse placements, plant recipes and the wiring route.

Open the answer for your current puzzle. Fixed recipes can be followed directly; match the PAT screens to the current pattern rather than treating the table as a sequence of rounds.
Laboratory guide · Show solution
- STYRENE
- ACRYLONITRILE
- BUTADIENE
- STYRENE
One player reads the exact bottle label and the next step; the other operates the machine and reports what was added. Confirm the second styrene step before moving to the printer. The checker verifies order only; it does not infer quantities from the note.
Computer components require matching sockets. Compare shape and orientation before inserting a part; do not assume every part with a similar color fits. Finish the printer task before moving on to the prototype checkpoint.
PAT lock · Show solution
One player reads the four screens while the other selects the four matching symbols. The game checks the selected symbols, not their click order. Once they are correct, set the three dials to the numbers shown below. Use the dial readings, not a count of turns. A failed selection resets the puzzle and picks another pattern, so read the screens again.
Pattern 1




Dials 1 / 2 / 3: 4 / 2 / 3
Pattern 2



Dials 1 / 2 / 3: 2 / 4 / 3
Pattern 3



Dials 1 / 2 / 3: 2 / 3 / 5
Pattern 4

Dials 1 / 2 / 3: 4 / 1 / 5
Pattern 5



Dials 1 / 2 / 3: 2 / 5 / 4
Pattern 6
Dials 1 / 2 / 3: 4 / 2 / 3
Pattern 7

Dials 1 / 2 / 3: 5 / 2 / 5
Laser guide · Show solution
- Pingosius Crystalis
- Rupium
- Cattonimus
First confirm all three names. Then calibrate the beam and direct it into the large machine’s beam entry before augmentation. Correct crystals alone do not prove that the beam is aligned.
Have one player read the terminal or chart while the other reports slot order and beam destination. If the machine reports a wrong crystal configuration, recheck names and positions; if that is correct, inspect the beam path separately.
Wiring & power-routing guide · Show solution
This route is for the main headquarters server room, at Routing Power, not the earlier numbered-and-lettered tutorial network. Each arrow means activate the next server so power travels along an existing connection; it does not mean attach a new cable between each pair.
Begin from the powered starting node. After each activation, wait for the current animation to finish and the new server to come online. The next server must connect directly to the current online node. The previous node goes into standby, which still counts as powered for the objectives.
Stage 1 requires Ψ02; stage 2 requires Ψ02 and λ03; stage 3 requires Ψ02, λ03 and θ03. The complete route below covers every third-stage target. Pressing only those three targets is not a valid route.
Ψ01 → Ψ04 → Ψ02 → Ψ03 → Ψ06 → Σ04 → Σ03 → Σ01 → Σ02 → Ψ08 → θ03 → θ02 → θ04 → Δ05 → Δ04 → Δ03 → λ02 → λ03 → λ01 → Ψ07
- Stage 1 · Ψ02
- Stage 2 · Ψ02 + λ03
- Stage 3 · Ψ02 + λ03 + θ03
Time-maze fuseboxes · Show solution
Face the insertion side of the fusebox. In this guide, slots are numbered 1–4 across the top row and 5–8 across the bottom, from left to right. Insert the listed colors one at a time in the given order. One player watches the feedback while the other inserts each fuse; confirm the next prompt before continuing. Leave all other slots empty.
Entrance
Top row
Bottom row
- Slot 1 · Orange
- Slot 5 · Orange
- Slot 8 · Orange
Rear laser area
Top row
Bottom row
- Slot 5 · Green
- Slot 4 · Purple
- Slot 6 · Purple
- Slot 1 · Orange
- Slot 7 · Orange
- Slot 3 · Green
Front laser area
Top row
Bottom row
- Slot 5 · Green
- Slot 4 · Purple
- Slot 6 · Purple
- Slot 1 · Orange
- Slot 7 · Orange
- Slot 3 · Green
Security office
Top row
Bottom row
- Slot 3 · Purple
- Slot 1 · Orange
- Slot 8 · Orange
Vault
Top row
Bottom row
- Slot 7 · Orange
- Slot 3 · Purple
- Slot 2 · Purple
- Slot 4 · Orange
Greenhouse guide · Show solution
Plant growth recipes
The recipes below describe seed growth. Climate control and room progression are separate requirements. Names describe appearance and function.
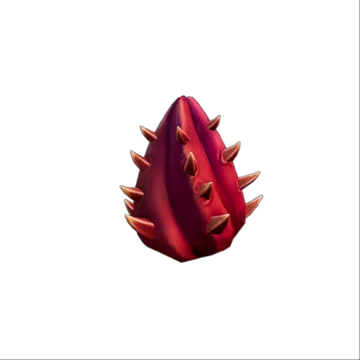
Bush
Green + Red
- Water
- Not checked
- Light sources
- 1
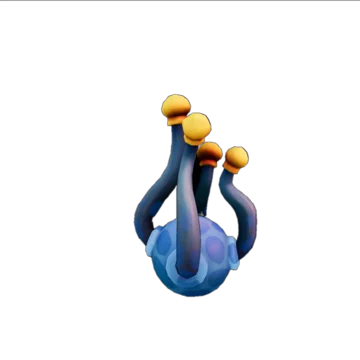
Area-discharge plant
Purple + Orange
- Water
- Keep dry
- Light sources
- Not checked

Socket-bud plant
Purple + Blue
- Water
- Keep dry
- Light sources
- 1

Ladder plant
Orange + Green
- Water
- Not checked
- Light sources
- 1
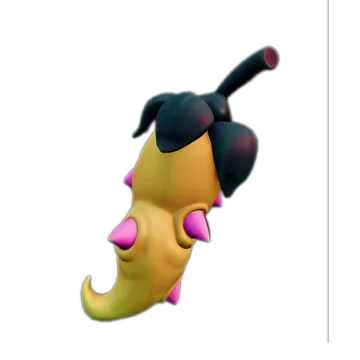
False ladder plant
Green + Blue
- Water
- Not checked
- Light sources
- Not checked

Light plant
Purple + Red
- Water
- Not checked
- Light sources
- Not checked

Step plant
Red + Orange
- Water
- Not checked
- Light sources
- Not checked
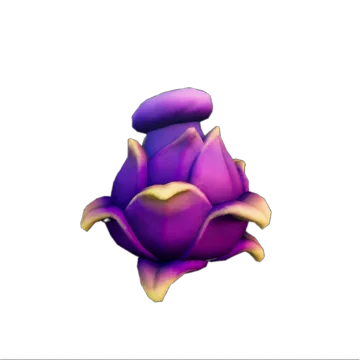
High-capacity plant
Blue + Red
- Water
- Required
- Light sources
- Not checked
Do not treat every seed as the same plant. The socket-bud electrical plant should be kept away from water; the high-capacity plant is specifically noted as reacting to water. A nearby electrical-area plant can shock you.
Restore power before relying on climate control. Poor laboratory conditions can trigger a full lockdown. Split duties: one player keeps track of the seed and environmental clues; the other changes one input at a time. Save a working combination before testing another.
We Were Here Tomorrow · Steam · © Total Mayhem Games