

Never Wither · Creatures & skills
Compare ten selected creatures, their useful abilities, combat roles and production responsibilities.
Demo reference · Reviewed 19 October 2026

This is an independent guide, not an official wiki. Current in-game descriptions take priority. Archive entries and later unlocks do not prove that every creature, recipe or ability is obtainable at the start.
Results:
No matching entries.

Quillfur
Useful mechanics
Spikes apply Bleed. Spiked Roll moves 6 metres and grants invulnerability while rolling. Bleed can stack up to five times for five seconds.
How to use it
Maintain ranged pressure, then use the roll to escape a committed attack. Do not spend your defensive move just to reach the enemy sooner. Spineberries provide an accessible healing option.

Graveling
Useful mechanics
Graveling can break ore. Stone Ward is part of its defensive kit; a separate trait can restore one stack every three seconds outside combat when no damage is taken.
How to use it
Take it when ore is the bottleneck. Inspect your actual trait and buff descriptions before treating shield recovery or switching behaviour as guaranteed for every specimen.

Waterborn
Useful mechanics
Waterborn uses stored water for its projectile skills and can run a Spirit Spring, which purifies or combines liquids. Water-related stacks affect its combat performance.
How to use it
Choose a water-accessible fight and refill before committing. A combat Waterborn and a dedicated spring worker serve different jobs; avoid dismantling your refining chain for one expedition.

Stumpy
Useful mechanics
Its field ability converts 10 Living Water into one Purification Seed per cast. It can also become a Seedbearing Tree for base production.
How to use it
Keep an emergency water reserve for both capture supplies and the World Tree. Field crafting is a fallback; use base production for sustained collection trips.

Florafairy
Useful mechanics
When switched out, flowers on the field orbit the active form and damage enemies they touch. Its Purification Bud can clear deep corruption from amber-sealed creatures.
How to use it
Place flowers, switch before the field is empty, then approach only during a safe opening. Keep access to a Purification Bud for creatures ordinary seeds cannot finish purifying.

Slime
Useful mechanics
Devour requires enemy current HP below 20% of the Slime’s maximum HP. It restores 5% HP and adds Nutrition for 20 seconds. Each stack increases maximum HP by 10% and size by 15%.
How to use it
Read your current maximum HP before checking the threshold. Do not calculate eligibility from the enemy’s health percentage. A Dissolution Pool handles unwanted artifacts and some clutter.

Gulpfrog
Useful mechanics
Its kit includes tongue-based slowing. Travel Form and water-surface jumping are unlockable capabilities rather than assumptions for a freshly acquired frog.
How to use it
Check the unlocked blessing or form before planning a shortcut over water or a high ledge. Pair it with a reliable damage dealer for exploration.

Treechelone
Useful mechanics
Retracting into its shell grants armor and heals it over time. The amount and duration depend on the active skill parameters.
How to use it
Use recovery when the incoming attack permits staying still. Defensive recovery is not permission to ignore every boss mechanic.
Bobtail Hunter
Useful mechanics
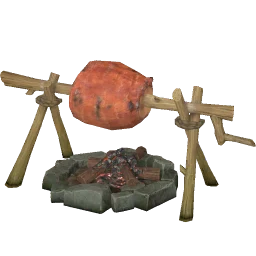
The Bobtail Hunter sets up a Bobtail Grill to prepare food before a hunt.
How to use it
Keep a dedicated cook when food supply is tight. Check ingredient stock and the worker before adding more crafting queues.
Bobtail Squire
Useful mechanics
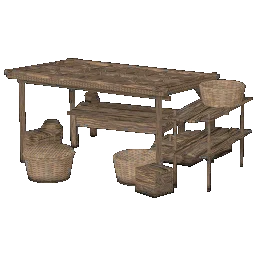
Its workshop processes basic materials and hunting tools. Wood becomes planks; stone can be processed into building bricks.
How to use it
The current workbench belongs to the Bobtail Squire, not Stumpy. Obtain the correct creature before planning a construction chain.
Explore more
Game artwork: Geo Seed Games / Luckycalf. Independent guide by IndieTome.